For this years hack.lu CTF I felt like creating a challenge. Since I work
a lot with TLS it was only natural for me to create a TLS challenge. I was informed that TLS challenges are quite uncommon but nevertheless I thought it would be nice to spice the competition up with something "unusual". The challenge mostly requires you to know a lot of details on how the TLS record layer and the key derivation works. The challenge was only solved by one team (0ops from China) during the CTF. Good job!
So let me introduce the challenge first.
The Challenge
You were called by the incident response team of Evil-Corp, the urgently need your help. Somebody broke into the main server of the company, bricked the device and stole all the files! Nothing is left! This should have been impossible. The hacker used some secret backdoor to bypass authentication. Without the knowledge of the secret backdoor other servers are at risk as well! The incident response team has a full packet capture of the incident and performed an emergency cold boot attack on the server to retrieve the contents of the memory (its a really important server, Evil Corp is always ready for such kinds of incidents). However they were unable to retrieve much information from the RAM, what's left is only some parts of the "
key_block" of the TLS server. Can you help Evil-Corp to analyze the exploit the attacker used?
(Flag is inside of the attackers' secret message).
TT = Could not recover
key_block:6B 4F 93 6A TT TT TT TT TT TT 00 D9 F2 9B 4C B02D 88 36 CF B0 CB F1 A6 7B 53 B2 00 B6 D9 DC EF66 E6 2C 33 5D 89 6A 92 ED D9 7C 07 49 57 AD E1TT TT TT TT TT TT TT TT 56 C6 D8 3A TT TT TT TTTT TT TT TT TT TT TT TT 94 TT 0C EB 50 8D 81 C4E4 40 B6 26 DF E3 40 9A 6C F3 95 84 E6 C5 86 4049 FD 4E F2 A0 A3 01 06If you are not interested in the solution and want to try the challenge on your own first, do not read past this point. Spoilers ahead.
The Solution
So lets analyze first what we got. We have something called a "
key_block" but we do not have all parts of it. Some of the bytes have been destroyed and are unknown to us. Additionally, we have a PCAP file with some weird messages in them. Lets look at the general structure of the message exchange first.
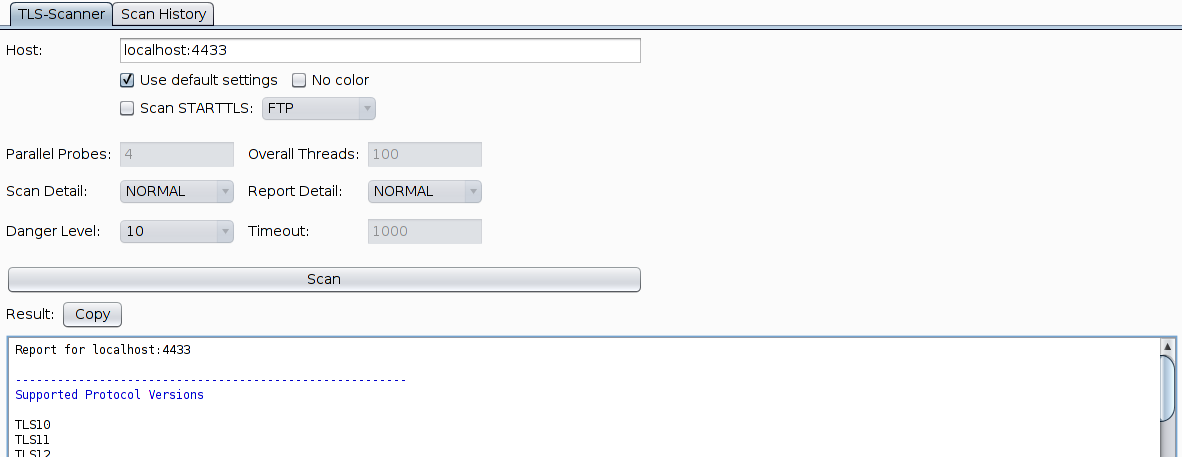
So looking at the IP address and TCP ports we see that the attacker/client was 127.0.0.1:36674 and was talking with the Server 127.0.0.1:4433. When looking at the individual messages we can see that the message exchange looked something like this:
ENC HS MESSAGE .... ENC HS MESSAGE -> <- SERVER HELLO, CERTIFICATE, SERVER HELLO DONEENC HS MESSAGE .... ENC HS MESSAGE CCS ENC HS MESSAGE, ENC HS MESSAGE -><-CCS, ENC HS MESSAGE ENC HEARTBEAT -><- ENC HEARTBEAT-> ENC APPLICATION DATA<- INTERNAL ERROR ... INTERNAL ERRORSo this message exchange appears weird. Usually the client is supposed to send a
ClientHello in the beginning of the connection, and not encrypted handshake messages. The same is true for the second flight of the client. Usually it transmits its
ClientKeyExchange message here, then a
ChangeCipherSpec message and finally its
Finished message. If we click at the first flight of the client, we can also see some ASCII text fragments in its messages.
Furthermore we can assume that the message sent after the
ChangeCipherSpec from the server is actually a TLS
Finished message.
Since we cannot read a lot from the messages the client is sending (in Wireshark at least), we can look at the messages the server is sending to get a better hold of what is going on. In the
ServerHello message the server selects the parameters for the connection. This reveals that this is indeed a
TLS 1.1 connection with
TLS_RSA_WITH_AES_256_CBC_SHA , no compression and the
Heartbeat Extension negotiated. We can also see that the
ServerRandom is:
1023047c60b420bb3321d9d47acb933dbe70399bf6c92da33af01d4fb770e98c (note that it is always 32 bytes long, the UNIX time is part of the
ServerRandom).
Looking at the certificate the server sent we can see that the server used a self-signed certificate for Evil.corp.com with an 800-bit RSA modulus:
00ad87f086a4e1acd255d1d77324a05ea7d250f285f3a6de35b9f07c5d083add5166677425b8335328255e7b562f944d55c56ff084f4316fdc9e3f5b009fefd65015a5ca228c94e3fd35c6aba83ea4e20800a34548aa36a5d40e3c7496c65bdbc864e8f161and the public exponent 65537.
If you pay very close attention to the handshake you can see another weird thing. The size of the exchanged
HeartbeatMessages is highly uneven. The client/attacker sent 3500 bytes, the server is supposed to decrypt these messages, and reflect the contents of them. However, the Server sent ~64000 bytes instead. The heartbeat extension became surprisingly well known in 2014, due to the
Heartbleed bug in OpenSSL. The bug causes a buffer over-read on the server, causing it to reflect parts of its memory content in return to malicious heartbeat requests. This is a good indicator that this bug might play a role in this challenge.
But what is this
key_block thing we got from the incident response team? TLS 1.1 CBC uses 4 symmetric keys in total. Both parties derive these keys from the "
master secret" as the
key_block. This
key_block is then chunked into the individual keys. You can imagine the
key_block as some PRF output and both parties knowing which parts of the output to use for which individual key. In TLS 1.1 CBC the
key_block is chunked as follows: The first N bytes are the
client_write_MAC key, the next N bytes are the
server_write_MAC key, the next P bytes are the
client_write key and the last P bytes are the
server_write key. N is the length of the HMAC key (which is at the time of writing for all cipher suites the length of the HMAC) and P is the length of the key for the block cipher.
In the present handshake AES-256 was negotiated as the block cipher and SHA (SHA-1) was negotiated for the HMAC. This means that N is 20 (SHA-1 is 20 bytes) and P is 32 (AES-256 requires 32 bytes of key material).
Looking at the given
key_block we can chunk it into the individual keys:
client_write_MAC = 6B4F936ATTTTTTTTTTTT00D9F29B4CB02D8836CFserver_write_MAC = B0CBF1A67B53B200B6D9DCEF66E62C335D896A92client_write = EDD97C074957ADE1TTTTTTTTTTTTTTTT56C6D83ATTTTTTTTTTTTTTTTTTTTTTTTserver_write = 94TT0CEB508D81C4E440B626DFE3409A6CF39584E6C5864049FD4EF2A0A30106Since not all parts of the
key_block are present, we can see that we actually have 14/20 bytes of the
client_write_MAC key, the whole
server_write_MAC key, 12/32 bytes of the
client_write key and 31/32 bytes of the
server_write key.
The
client_write_MAC key is used in the HMAC computations
from the client
to the server (the server uses the same key to verify the HMAC),
The
server_write_MAC key is used in the HMAC computations
from the server
to the client (the client uses the same key to verify the HMAC),
The
client_write key is used to encrypt messages
from the client
to the server, while the
server_write key is used to encrypt messages
from the server
to the client.
So looking at the keys we could compute HMAC's from the client if we could guess the remaining 6 bytes. We could compute HMAC's from the server directly, we have not enough key material to decrypt the client messages, but we could decrypt server messages if we brute-forced one byte of the
server_write key. But how would you brute force this byte? When do we know when we got the correct key? Lets look at how the TLS record layer works to find out :)
The Record Layer
TLS consists out of multiple protocols (Handshake, Alert, CCS, Application (and Heartbeat)). If one of those protocols wants to send any data, it has to pass this data to the record layer. The record layer will chunk this data, compress it if necessary, encrypt it and attach a "record header" to it.
This means, that if we want to decrypt a message we know that if we used the correct key the message should always have a correct padding. If we are unsure we could even check the HMAC with the
server_write_MAC key.
In TLS 1.0 - TLS 1.2 the padding looks like this:
1 byte padding : 00
2 bytes padding: 01 01
3 bytes padding: 02 02 02
4 bytes padding: 03 03 03 03
...
So if we guessed the correct key we know that the plaintext has to have valid padding.
An ideal candidate for our brute force attack is the server
Finished message. So lets use that to check our key guesses.
The ciphertext looks like this:
0325f41d3ebaf8986da712c82bcd4d55c3bb45c1bc2eacd79e2ea13041fc66990e217bdfe4f6c25023381bab9ddc8749535973bd4cacc7a4140a14d78cc9bdddThe first 16 bytes of the ciphertext are the IV:
IV: 0325f41d3ebaf8986da712c82bcd4d55Therefore the actual ciphertext is:
Ciphertext: c3bb45c1bc2eacd79e2ea13041fc66990e217bdfe4f6c25023381bab9ddc8749535973bd4cacc7a4140a14d78cc9bdddThe 256 key candidates are quick to check, and it is revealed that
0xDC was the missing byte.
(The plaintext of the
Finished is
1400000C455379AAA141E1B9410B413320C435DEC948BFA451C64E4F30FE5F6928B816CA0B0B0B0B0B0B0B0B0B0B0B0B)
Now that we have the full
server_write key we can use it to decrypt the heartbeat records.
This is done in the same way as with the
Finished. Looking at the decrypted heartbeat messages we can see a lot of structured data, which is an indicator that we are actually dealing
with the Heartbleed bug. If we convert the content of the heartbeat messages to ASCII we can actually see that the private key of the server is PEM encoded in the first heartbeat message.
Note: This is different to a real heartbeat exploit. Here you don't usually get the private key nicely encoded but have to extract it using the coppersmith's attack or similar things. I did not want to make this challenge even harder so I was so nice to write it to the memory for you :)The private key within the
Heartbeat messages looks like this:
-----BEGIN RSA PRIVATE KEY-----MIIB3gIBAAJlAK2H8Iak4azSVdHXcySgXqfSUPKF86beNbnwfF0IOt1RZmd0JbgzUyglXntWL5RNVcVv8IT0MW/cnj9bAJ/v1lAVpcoijJTj/TXGq6g+pOIIAKNFSKo2pdQOPHSWxlvbyGTo8WECAwEAAQJkJj95P2QmLb5qlgbj5SXH1zufBeWKb7Q4qVQdRTAkMVXYuWK7UZ9Wa9nYulyjvg9RoWOO+SaDNqhiTWKosQ+ZrvG3A1TDMcVZSkPxbXCuhhRpp4j0T9levQi0s8tR1YuFzVFi8QIzANNLrgK2YOJiDlyu78t/eVbBey4muh2xaxvEd8xGX4bIBlTuWlKIqwPNxE8fygmv4uHFAjMA0j7Uk1ThY+UCYdeCm4/PeVqkPYu7jNTHG2TGr/B6hstxyFpXBlq6MJQ/qPdRXLkLFu0CMwCf/OLCTQPpBiQny5HoPRpMNW4m0M4F46vdN5MaCoMUU+pvbpbXfYI3/BrTapeZZCNfnQIzAJ7XzW9Kj8cTPIuDcS/qpQvAiZneOmKaV5vAtcQzYb75cgu3BUzNuyH8v2P/Br+RJmm5AjMAjp9N+xdEm4dW51lyUp6boVU6fxZimfYRfYANU2bVFmbsSAU9jzjWb0BuXexKKcX7XGo=-----END RSA PRIVATE KEY-----We should store it in a file and decode it with OpenSSL to get the actual key material.
>> openssl rsa -in key.pem -text -nooutRSA Private-Key: (800 bit, 2 primes)modulus: 00:ad:87:f0:86:a4:e1:ac:d2:55:d1:d7:73:24:a0: 5e:a7:d2:50:f2:85:f3:a6:de:35:b9:f0:7c:5d:08: 3a:dd:51:66:67:74:25:b8:33:53:28:25:5e:7b:56: 2f:94:4d:55:c5:6f:f0:84:f4:31:6f:dc:9e:3f:5b: 00:9f:ef:d6:50:15:a5:ca:22:8c:94:e3:fd:35:c6: ab:a8:3e:a4:e2:08:00:a3:45:48:aa:36:a5:d4:0e: 3c:74:96:c6:5b:db:c8:64:e8:f1:61publicExponent: 65537 (0x10001)privateExponent: 26:3f:79:3f:64:26:2d:be:6a:96:06:e3:e5:25:c7: d7:3b:9f:05:e5:8a:6f:b4:38:a9:54:1d:45:30:24: 31:55:d8:b9:62:bb:51:9f:56:6b:d9:d8:ba:5c:a3: be:0f:51:a1:63:8e:f9:26:83:36:a8:62:4d:62:a8: b1:0f:99:ae:f1:b7:03:54:c3:31:c5:59:4a:43:f1: 6d:70:ae:86:14:69:a7:88:f4:4f:d9:5e:bd:08:b4: b3:cb:51:d5:8b:85:cd:51:62:f1prime1: 00:d3:4b:ae:02:b6:60:e2:62:0e:5c:ae:ef:cb:7f: 79:56:c1:7b:2e:26:ba:1d:b1:6b:1b:c4:77:cc:46: 5f:86:c8:06:54:ee:5a:52:88:ab:03:cd:c4:4f:1f: ca:09:af:e2:e1:c5prime2: 00:d2:3e:d4:93:54:e1:63:e5:02:61:d7:82:9b:8f: cf:79:5a:a4:3d:8b:bb:8c:d4:c7:1b:64:c6:af:f0: 7a:86:cb:71:c8:5a:57:06:5a:ba:30:94:3f:a8:f7: 51:5c:b9:0b:16:edexponent1: 00:9f:fc:e2:c2:4d:03:e9:06:24:27:cb:91:e8:3d: 1a:4c:35:6e:26:d0:ce:05:e3:ab:dd:37:93:1a:0a: 83:14:53:ea:6f:6e:96:d7:7d:82:37:fc:1a:d3:6a: 97:99:64:23:5f:9dexponent2: 00:9e:d7:cd:6f:4a:8f:c7:13:3c:8b:83:71:2f:ea: a5:0b:c0:89:99:de:3a:62:9a:57:9b:c0:b5:c4:33: 61:be:f9:72:0b:b7:05:4c:cd:bb:21:fc:bf:63:ff: 06:bf:91:26:69:b9coefficient: 00:8e:9f:4d:fb:17:44:9b:87:56:e7:59:72:52:9e: 9b:a1:55:3a:7f:16:62:99:f6:11:7d:80:0d:53:66: d5:16:66:ec:48:05:3d:8f:38:d6:6f:40:6e:5d:ec: 4a:29:c5:fb:5c:6aSo now we got the private key. But what do we do with it? Since this is an RSA handshake we should be able to decrypt the whole session (RSA is not perfect forward secure). Loading it into Wireshark does not work, as Wireshark is unable to read the messages sent by the client. What is going on there?
De-fragmentation
So if you do not yet have a good idea of what the record layer is for, you can imagine it like envelops. If someone wants to send some bytes, you have to put them in an envelop and transmit them. Usually implementations use one big envelop for every message, however you can also send a single message in multiple envelops.
The attacker did exactly that. He fragmented its messages into multiple records. This is not very common for handshake messages but fine according to the specification and accepted by almost all implementations. However, Wireshark is unable to decode these kinds of messages and therefore unable to use our private key to decrypt the connection. So we have to do this step manually.
So each record has the following fields:
Type | Version | Length | DataIf we want to reconstruct the
ClientHello message we have to get all the data fields of the records of the first flight and decode them.
This is simply done by clicking on each record in Wireshark and concatenating the data fields. This step is at least on my Wireshark version (3.0.5) not very easy as the copying is actually buggy, and Wireshark is not copying the correct bytes.
As you can see in the image, the record is supposed to have a length of 8 bytes, but Wireshark is only copying 4 bytes. I am not sure if this bug is actually only in my version or affects all Wireshark versions. Instead of copying the records individually I therefore copied the whole TCP payload and chunked it manually into the individual records.
16030200080100009e03020000160302000800000000004e6f6216030200086f64796b6e6f77731603020008696d616361740000160302000800000000000020531603020008746f70206c6f6f6b1603020008696e67206e6f74681603020008696e6720746f20661603020008696e6468657265001603020008020035010000530016030200080f0001011337001516030200084576696c436f72701603020008206b696c6c7320701603020008656f706c65000d0016030200082c002a0102020203160302000802040205020602011603020008010201030104010516030200080106010103020303160302000803040305030603ed1603020008edeeeeefefff010016030200020100If we structure this data it looks like this:
Type Version Length Payload16 0302 0008 0100009e0302000016 0302 0008 00000000004e6f6216 0302 0008 6f64796b6e6f777316 0302 0008 696d61636174000016 0302 0008 000000000000205316 0302 0008 746f70206c6f6f6b16 0302 0008 696e67206e6f746816 0302 0008 696e6720746f206616 0302 0008 696e64686572650016 0302 0008 020035010000530016 0302 0008 0f0001011337001516 0302 0008 4576696c436f727016 0302 0008 206b696c6c73207016 0302 0008 656f706c65000d0016 0302 0008 2c002a010202020316 0302 0008 020402050206020116 0302 0008 010201030104010516 0302 0008 010601010302030316 0302 0008 03040305030603ed16 0302 0008 edeeeeefefff010016 0302 0002 0100The actual message is the concatenation of the record payloads:
0100009e0302000000000000004e6f626f64796b6e6f7773696d6163617400000000000000002053746f70206c6f6f6b696e67206e6f7468696e6720746f2066696e64686572650002003501000053000f000101133700154576696c436f7270206b696c6c732070656f706c65000d002c002a010202020302040205020602010102010301040105010601010302030303040305030603ededeeeeefefff01000100So what is left is to parse this message. There is an easy way on how to do this an a labor intensive manual way. Lets do the manual process first :) .
We know from the record header that his message is in fact a handshake message (
0x16).
According to the specification handshake messages look like this:
struct { HandshakeType msg_type; /* handshake type */ uint24 length; /* bytes in message */ select (HandshakeType) { case hello_request: HelloRequest; case client_hello: ClientHello; case server_hello: ServerHello; case certificate: Certificate; case server_key_exchange: ServerKeyExchange; case certificate_request: CertificateRequest; case server_hello_done: ServerHelloDone; case certificate_verify: CertificateVerify; case client_key_exchange: ClientKeyExchange; case finished: Finished; } body; } Handshake; This is RFC speak for: Each handshake message starts with a type field which says which handshake message this is, followed by a 3 byte length field which determines the length of rest of the handshake message.
So in our case the msg_type is
0x01 , followed by a 3 Byte length field (
0x00009e, 158[base10]).
0x01 means
ClientHello (
https://www.iana.org/assignments/tls-parameters/tls-parameters.xhtml#tls-parameters-7). This means we have to parse the bytes after the length field as a
ClientHello.
{ ProtocolVersion client_version; Random random; SessionID session_id; CipherSuite cipher_suites<2..2^16-2>; CompressionMethod compression_methods<1..2^8-1>; select (extensions_present) { case false: struct {}; case true: Extension extensions<0..2^16-1>; }; } ClientHello;This means: The next 2 bytes are the
ProtocolVersion, the next 32 bytes are the
ClientRandom, the next byte is the
SessionID Length, the next
SessionID Length many bytes are the
SessionID, the next 2 bytes are the
CipherSuite Length bytes, followed by
CipherSuite Length many
CipherSuites, followed by a 1 byte
Compression Length field, followed by
Compression Length many
CompressionBytes followed by a 2 byte
Extension Length field followed by
extension length many
ExtensionBytes. So lets try to parse this:
Handshakye Type : 01 Handshake Length : 00009eProtocolVersion : 0302ClientRandom : 000000000000004e6f626f64796b6e6f7773696d616361740000000000000000SessionID Length : 20SessionID : 53746f70206c6f6f6b696e67206e6f7468696e6720746f2066696e6468657265CipherSuite Length: 0002CipherSuites : 0035Compression Length: 01CompressionBytes : 00Extension Length : 0053ExtensionBytes: : 000f000101133700154576696c436f7270206b696c6c732070656f706c65000d002c002a010202020302040205020602010102010301040105010601010302030303040305030603ededeeeeefefff01000100This is manual parsing is the slow method of dealing with this. Instead of looking at the specification to parse this message we could also compare the message structure to another
ClientHello. This eases this process a lot. What we could also do is record the transmission of this message as a de-fragmented message to something and let Wireshark decode it for us. To send the de-fragmented message we need to create a new record header ourselves. The record should look like this:
Type : 16Version: 0302Length : 00A2Payload: 0100009e0302000000000000004e6f626f64796b6e6f7773696d6163617400000000000000002053746f70206c6f6f6b696e67206e6f7468696e6720746f2066696e64686572650002003501000053000f000101133700154576696c436f7270206b696c6c732070656f706c65000d002c002a010202020302040205020602010102010301040105010601010302030303040305030603ededeeeeefefff01000100To send this record we can simply use netcat:
echo '16030200A20100009e0302000000000000004e6f626f64796b6e6f7773696d6163617400000000000000002053746f70206c6f6f6b696e67206e6f7468696e6720746f2066696e64686572650002003501000053000f000101133700154576696c436f7270206b696c6c732070656f706c65000d002c002a010202020302040205020602010102010301040105010601010302030303040305030603ededeeeeefefff01000100' | xxd -r -p | nc localhost 4433Now we can use Wireshark to parse this message. As we can see now, the weired ASCII fragments we could see in the previous version are actually the
ClientRandom, the
SessionID, and a custom extension from the attacker. Now that we have de-fragmented the message, we know the
ClientRandom: 000000000000004e6f626f64796b6e6f7773696d616361740000000000000000De-fragmenting the ClientKeyExchange message
Now that we have de-fragmented the first flight from the attacker, we can de-fragment the second flight from the client. We can do this in the same fashion as we de-fragmented the
ClientHello.
16 0302 0008 1000006600645de116 0302 0008 66a6d3669bf2193616 0302 0008 5ef3d35410c5028316 0302 0008 c4dd038a1b6fedf516 0302 0008 26d5b193453d796f16 0302 0008 6e63c144bbda627616 0302 0008 3740468e2189164116 0302 0008 0671318e83da3c2a16 0302 0008 de5f6da6482b09fc16 0302 0008 a5c823eb4d9933fe16 0302 0008 ae17d165a6db0e9416 0302 0008 bb09574fc1f7b8ed16 0302 0008 cfbcf9e9696b617316 0302 0002 f4b6
14 0302 0001 01
16 0302 0030 cbe6bf1ae7f2bc40a49709a06c0e3149a65b8cd93c2525b5bfa8f696e29880d3447aef3dc9a996ca2aff8be99b1a415716 0302 0030 9bf02969ca42d203e566bcc696de08fa80e0bfdf44b1b315aed17fe867aed6d0d600c73de59c14beb74b0328eacadcf9Note that his time we have 3 record groups. First there is chain of handshake records, followed by a
ChangeCipherSpec record, followed by 2 more handshake records. The TLS specification forbids that records of different types are interleaved. This means that the first few records a probably forming a group of messages. The
ChangeCipherSpec record is telling the server that subsequent messages are encrypted. This seems to be true, since the following records do not appear to be plaintext handshake messages.
So lets de-fragment the first group of records by concatenating their payloads:
1000006600645de166a6d3669bf219365ef3d35410c50283c4dd038a1b6fedf526d5b193453d796f6e63c144bbda62763740468e218916410671318e83da3c2ade5f6da6482b09fca5c823eb4d9933feae17d165a6db0e94bb09574fc1f7b8edcfbcf9e9696b6173f4b6Since this is a handshake message, we know that the first byte should tell us which handshake message this is.
0x10 means this is a
ClientKeyExchange message. Since we already know that
TLS_RSA_WITH_AES_256_CBC_SHA was negotiated for this connection, we know that this is an RSA
ClientKeyExchange message.
These messages are supposed to look like this (I will spare you the lengthy RFC definition):
Type (0x10)Length (Length of the content) (3 bytes)EncryptedPMS Length(Length of the encrypted PMS) (2 bytes)EncrpytedPMS (EncryptedPMS Length many bytes) For our message this should look like this:
Type: 10 Length: 000066Encrypted PMS Length: 0064 Encrypted PMS: 5de166a6d3669bf219365ef3d35410c50283c4dd038a1b6fedf526d5b193453d796f6e63c144bbda62763740468e218916410671318e83da3c2ade5f6da6482b09fca5c823eb4d9933feae17d165a6db0e94bb09574fc1f7b8edcfbcf9e9696b6173f4b6 Now that we got the Encrypted PMS we can decrypt it with the private key. Since the connection negotiated RSA as the key exchange algorithm this is done with:
encPMS^privKey mod modulus = plainPMS
We can solve this equation with the private key from the leaked PEM file.
2445298227328938658090475430796587247849533931395726514458166123599560640691186073871766111778498132903314547451268864032761115999716779282639547079095457185023600638251088359459150271827705392301109265654638212139757207501494756926838535350 ^ 996241568615939319506903357646514527421543094912647981212056826138382708603915022492738949955085789668243947380114192578398909946764789724993340852568712934975428447805093957315585432465710754275221903967417599121549904545874609387437384433 mod 4519950410687629988405948449295924027942240900746985859791939647949545695657651701565014369207785212702506305257912346076285925743737740481250261638791708483082426162177210620191963762755634733255455674225810981506935192783436252402225312097
Solving this equation gives us:
204742908894949049937193473353729060739551644014729690547520028508481967333831905155391804994508783506773012994170720979080285416764402813364718099379387561201299457228993584122400808905739026823578773289385773545222916543755807247900961
in hexadecimal this is:
00020325f41d3ebaf8986da712c82bcd4d554bf0b54023c29b624de9ef9c2f931efc580f9afb081b12e107b1e805f2b4f5f0f1000302476574204861636b6564204e6f6f622c20796f752077696c6c206e65766572206361746368206d65212121212121The PMS is PKCS#1.5 encoded. This means that it is supposed to start with
0x0002 followed by a padding which contains no
0x00 bytes, followed by a separator
0x00 byte followed by a payload. In TLS, the payload has to be exactly 48 bytes long and has to start with the highest proposed protocol version of the client. We can see that this is indeed the case for our decrypted payload. The whole decrypted payload is the PMS for the connection.
This results in the PMS:
0302476574204861636b6564204e6f6f622c20796f752077696c6c206e65766572206361746368206d65212121212121 (which besides the protocol version is also ASCII :) )
Now that we have the PMS its time to revisit the key scheduling in TLS. We already briefly touched it but here is a overview:
As you can see, we first have to compute the master secret. With the master secret we can reconstruct the
key_block. If we have computed the
key_block, we can finally get the
client_write key and decrypt the message from the attacker.
master secret = PRF ( PMS, "master secret", ClientRandom | ServerRandom)
key_block = PRF (master_secret, "key expansion", ServerRandom | ClientRandom )Where "master secret" and "key expansion" are literally ASCII Strings.
Note that in the key_block computation ClientRandom and ServerRandom are exchanged. To do this computation we can either implement the PRF ourselfs, or easier, steal it from somewhere. The PRF in TLS 1.1 is the same as in TLS 1.0. Good places to steal from are for example openssl (C/C++), the
scapy project (python), the
TLS-Attacker project (java) or your favourite TLS library. The
master secret is exactly 48 bytes long. The length of the
key_block varies depending on the selected cipher suite and protocol version. In our case we need 2 * 20 bytes (for the 2 HMAC keys) + 2 * 32 bytes (for the 2 AES keys) = 104 bytes.
I will use the TLS-Attacker framework for this computation. The code will look like this:
This results in the following
master secret:
292EABADCF7EFFC495825AED17EE7EA575E02DF0BAB7213EC1B246BE23B2E0912DA2B99C752A1F8BD3D833E8331D649F And the following
key_block:
6B4F936ADE9B4010393B00D9F29B4CB02D8836CFB0CBF1A67B53B200B6D9DCEF66E62C335D896A92EDD97C074957ADE136D6BAE74AE8193D56C6D83ACDE6A3B365679C5604312A1994DC0CEB508D81C4E440B626DFE3409A6CF39584E6C5864049FD4EF2A0A30106 Now we can chunk our resulting
key_block into its individual parts. This is done analogously to the beginning of the challenge.
client_write_mac key = 6B4F936ADE9B4010393B00D9F29B4CB02D8836CFserver_write_mac key = B0CBF1A67B53B200B6D9DCEF66E62C335D896A92client_write key = EDD97C074957ADE136D6BAE74AE8193D56C6D83ACDE6A3B365679C5604312A19server_write key = 94DC0CEB508D81C4E440B626DFE3409A6CF39584E6C5864049FD4EF2A0A30106 Now that we have the full
client_write key we can use that key to decrypt the application data messages. But these messages are also fragmented. But since the messages are now encrypted, we cannot simply concatenate the payloads of the records, but we have to decrypt them individually and only concatenate the resulting plaintext.
Analogue to the decryption of the heartbeat message, the first 16 bytes of each encrypted record payload are used as an IV
IV, Ciphertext Plaintext6297cb6d9afba63ec4c0dd7ac0184570 a9c605307eb5f8ccbe8bbc210ff1ff14943873906fad3eca017f49af8feaec87 557365723A20726FB181CF546350A88ACBE8D0248D6FF07675D1514E03030303063c60d43e08c4315f261f8a4f06169a cdb5818d80075143afe83c79b570ab0b349b2e8748f8b767c54c0133331fb886 6F743B0A50617373D6F734D45FB99850CCAF32DF113914FC412C523603030303cd839b95954fcadf1e60ee983cbe5c21 ac6f6e1fe34ae4b1214cded895db4746b8e38d7960d7d45cb001aab8e18c7fc7 3A20726F6F743B0A937048A265327642BD5626E00E4BC79618F9A95C030303038092d75f72b16cb23a856b00c4c39898 8df099441e10dca5e850398e616e4597170796b7202e2a8726862cd760ebacdf 6563686F20224F7769EACFBEEB5EE5D1F0B72306F8C78AD86CB48350030303038e9f83b015fce7f9c925b8b64abee426 224a5fbd2d9b8fc6ded34222a943ec0e8e973bcf125b81f918e391a22b4b0e65 6E6564206279204061736E93BFDC5103C8C2FE8C543A72B924212E84030303030e24ba11e41bfcf66452dc80221288ce a66fb3aed9bdc7e08a31a0e7f14e11ce0983ec3d20dd47c179425243b14b08c9 6963306E7A31223B84A3CAFA7980B461DE0A6410D6251551AE401DD9030303030465fdb05b121cdc08fa01cdacb2c8f4 eff59402f4dbf35a85cc91a6d1264a895cd1b3d2014c91fbba03ec4c85d058c9 0A7375646F20726DB97422D8B30C54CC672FFEC3E9D771D4743D96B903030303e2ddbbb83fe8318c41c26d57a5813fab 89549a874ff74d83e182de34ecf55fff1a57008afd3a29ef0d839b991143cd2a 202F202D72663B0A996F3F1789CB9B671223E73C66A0BA578D0C0F3203030303524f5210190f73c984bd6a59b9cf424c b7f30fafe5ea3ac51b6757c51911e86b0aa1a6bbf4861c961f8463154acea315 0A666C61677B436868BF764B01D2CDCB2C06EA0DFC5443DABB6EC9AE0303030332765985e2e594cddca3d0f45bd21f49 a5edfe89fdb3782e2af978585c0e27ba3ef90eb658304716237297f97e4e72bc 696D696368616E67FBF32127FA3AF2F97770DE5B9C6D376A254EF51E03030303e0ae69b1fa54785dc971221fd92215fb 14e918a9e6e37139153be8cb9c16d2a787385746f9a80d0596580ba22eaf254e 61467233346B7D8BE8B903A167C44945E7676BF99D888A4B86FA8E0404040404The plaintext then has to be de-padded and de-MACed.
Data HMAC Pad:
557365723A20726F B181CF546350A88ACBE8D0248D6FF07675D1514E 030303036F743B0A50617373 D6F734D45FB99850CCAF32DF113914FC412C5236 030303033A20726F6F743B0A 937048A265327642BD5626E00E4BC79618F9A95C 030303036563686F20224F77 69EACFBEEB5EE5D1F0B72306F8C78AD86CB48350 030303036E65642062792040 61736E93BFDC5103C8C2FE8C543A72B924212E84 030303036963306E7A31223B 84A3CAFA7980B461DE0A6410D6251551AE401DD9 030303030A7375646F20726D B97422D8B30C54CC672FFEC3E9D771D4743D96B9 03030303202F202D72663B0A 996F3F1789CB9B671223E73C66A0BA578D0C0F32 030303030A666C61677B4368 68BF764B01D2CDCB2C06EA0DFC5443DABB6EC9AE 03030303696D696368616E67 FBF32127FA3AF2F97770DE5B9C6D376A254EF51E 0303030361467233346B7D 8BE8B903A167C44945E7676BF99D888A4B86FA8E 0404040404This then results in the following data:
Data:
557365723A20726F6F743B0A506173733A20726F6F743B0A6563686F20224F776E656420627920406963306E7A31223B0A7375646F20726D202F202D72663B0A0A666C61677B4368696D696368616E6761467233346B7D8BWhich is ASCII for:
User: root;Pass: root;echo "Owned by @ic0nz1";sudo rm / -rf;
flag{ChimichangaFr34k}Honestly this was quite a journey. But this presented solution is the tedious manual way. There is also a shortcut with which you can skip most of the manual cryptographic operations.
The Shortcut
After you de-fragmented the messages you can patch the PCAP file and then use Wireshark to decrypt the whole session. This way you can get the flag without performing any cryptographic operation after you got the private key. Alternatively you can replay the communication and record it with Wireshark. I will show you the replay of the messages. To recap the de-fragmented messages looks like this:
ClientHello
0100009e0302000000000000004e6f626f64796b6e6f7773696d6163617400000000000000002053746f70206c6f6f6b696e67206e6f7468696e6720746f2066696e64686572650002003501000053000f000101133700154576696c436f7270206b696c6c732070656f706c65000d002c002a010202020302040205020602010102010301040105010601010302030303040305030603ededeeeeefefff01000100ClientKeyExchange:
1000006600645de166a6d3669bf219365ef3d35410c50283c4dd038a1b6fedf526d5b193453d796f6e63c144bbda62763740468e218916410671318e83da3c2ade5f6da6482b09fca5c823eb4d9933feae17d165a6db0e94bb09574fc1f7b8edcfbcf9e9696b6173f4b6We should now add new (not fragmented) record header to the previously fragmented message. The messages sent from the server can stay as they are. The ApplicationData from the client can also stay the same. The messages should now look like this
ClientHello
16030200A20100009e0302000000000000004e6f626f64796b6e6f7773696d6163617400000000000000002053746f70206c6f6f6b696e67206e6f7468696e6720746f2066696e64686572650002003501000053000f000101133700154576696c436f7270206b696c6c732070656f706c65000d002c002a010202020302040205020602010102010301040105010601010302030303040305030603ededeeeeefefff01000100ServerHello / Certificate / ServerHelloDone
160302006A1000006600645de166a6d3669bf219365ef3d35410c50283c4dd038a1b6fedf526d5b193453d796f6e63c144bbda62763740468e218916410671318e83da3c2ade5f6da6482b09fca5c823eb4d9933feae17d165a6db0e94bb09574fc1f7b8edcfbcf9e9696b6173f4b61403020001011603020030cbe6bf1ae7f2bc40a49709a06c0e3149a65b8cd93c2525b5bfa8f696e29880d3447aef3dc9a996ca2aff8be99b1a415716030200309bf02969ca42d203e566bcc696de08fa80e0bfdf44b1b315aed17fe867aed6d0d600c73de59c14beb74b0328eacadcf9ClientKeyExchange / ChangeCipherSpec / Finished
160302006A1000006600645de166a6d3669bf219365ef3d35410c50283c4dd038a1b6fedf526d5b193453d796f6e63c144bbda62763740468e218916410671318e83da3c2ade5f6da6482b09fca5c823eb4d9933feae17d165a6db0e94bb09574fc1f7b8edcfbcf9e9696b6173f4b61403020001011603020030cbe6bf1ae7f2bc40a49709a06c0e3149a65b8cd93c2525b5bfa8f696e29880d3447aef3dc9a996ca2aff8be99b1a415716030200309bf02969ca42d203e566bcc696de08fa80e0bfdf44b1b315aed17fe867aed6d0d600c73de59c14beb74b0328eacadcf9')
ApplicationData
1703020030063c60d43e08c4315f261f8a4f06169acdb5818d80075143afe83c79b570ab0b349b2e8748f8b767c54c0133331fb8861703020030cd839b95954fcadf1e60ee983cbe5c21ac6f6e1fe34ae4b1214cded895db4746b8e38d7960d7d45cb001aab8e18c7fc717030200308092d75f72b16cb23a856b00c4c398988df099441e10dca5e850398e616e4597170796b7202e2a8726862cd760ebacdf17030200308e9f83b015fce7f9c925b8b64abee426224a5fbd2d9b8fc6ded34222a943ec0e8e973bcf125b81f918e391a22b4b0e6517030200300e24ba11e41bfcf66452dc80221288cea66fb3aed9bdc7e08a31a0e7f14e11ce0983ec3d20dd47c179425243b14b08c917030200300465fdb05b121cdc08fa01cdacb2c8f4eff59402f4dbf35a85cc91a6d1264a895cd1b3d2014c91fbba03ec4c85d058c91703020030e2ddbbb83fe8318c41c26d57a5813fab89549a874ff74d83e182de34ecf55fff1a57008afd3a29ef0d839b991143cd2a1703020030524f5210190f73c984bd6a59b9cf424cb7f30fafe5ea3ac51b6757c51911e86b0aa1a6bbf4861c961f8463154acea315170302003032765985e2e594cddca3d0f45bd21f49a5edfe89fdb3782e2af978585c0e27ba3ef90eb658304716237297f97e4e72bc1703020030e0ae69b1fa54785dc971221fd92215fb14e918a9e6e37139153be8cb9c16d2a787385746f9a80d0596580ba22eaf254eWhat we want to do now is create the following conversation:
CH-><-SH, CERT, SHD-> CKE, CCS, FIN-> APP, APP ,APPThis will be enough for Wireshark to decrypt the traffic. However, since we removed some messages (the whole
HeartbeatMessages) our HMAC's will be invalid.
We need to record an interleaved transmission of these message with Wireshark. I will use these simple python programs to create the traffic:
If we record these transmissions and tick the flag in Wireshark to ignore invalid HMAC's we can see the plaintext (if we added the private key in Wireshark).
Challenge Creation
I used our TLS-Attacker project to create this challenge. With TLS-Attacker you can send arbitrary TLS messages with arbitrary content in an arbitrary order, save them in XML and replay them. The communication between the peers are therefore only two XML files which are loaded into TLS-Attacker talking to each other. I then copied parts of the key_block from the debug output and the challenge was completed :)
If you have question in regards to the challenge you can DM me at
@ic0nz1Happy Hacking
More info
- Hacker Anonymous
- Pentest Os
- Basic Pentest 1 Walkthrough
- Hacking Browser
- Pentest Reporting Tool
- Hacking Device
- Pentest Website
- Basic Pentest 1 Walkthrough
- Hacking Device
- Hacker Language
- Hacking Growth
- Pentest Checklist
- Pentestmonkey